Building your own house might sound like a huge task, but with the right plan, tools, and a little determination, it can be one of the most rewarding experiences of your life. Whether you’re dreaming of a cozy cabin, a modern home, or a traditional house, aspiring homeowners can bring their vision to life. In this guide, we’ll break down the steps needed to build your own house in a way that’s easy to understand.
Table of Contents
- Planning Your Build
- Finding Your Location
- Designing Your Home
- Getting the Necessary Permits
- Gathering Your Tools and Materials
- Laying the Foundation
- Constructing the Frame
- Adding the Roof
- Installing Windows and Doors
- Finishing the Interior
- Final Touches and Inspections
- Conclusion
1. Planning Your Build
Finding Your Location
The first step in building your own house is finding the right piece of land. You need to consider several factors:
- Budget: Determine how much you can spend on land.
- Accessibility: Is it easy to get to? Check nearby roads and public transport.
- Utilities: Make sure the land can connect to water, electricity, and sewage systems.
- Zoning Laws: Check local regulations to ensure you can build what you want on the lot.
Designing Your Home
Now that you have your land, it’s time to design your home. Think about:
- Size: How many bedrooms and bathrooms do you need?
- Style: What architectural style do you like? Modern, rustic, farmhouse?
- Budget: Keep costs in mind when designing.
You can hire an architect or use online design software to create blueprints of your home.
2. Getting the Necessary Permits
Before you can start building, you need the required permits. This usually involves:
- Building Permits: Most areas require one to ensure the construction meets local building codes.
- Zoning Permits: This permits you to use the land as planned.
- Environmental Permits: If your land is near a wetland or other sensitive area, this may be required.
Check with your local city or county offices to find out what you need. It’s crucial to have these permits in place to avoid any penalties or having to stop construction.
3. Gathering Your Tools and Materials
Having the right tools will make your building process much smoother. Here is a list of essential tools you’ll need:
- Basic Hand Tools: Hammers, screwdrivers, wrenches, and pliers.
- Power Tools: Drill, saw, sander, and level.
- Safety Gear: Hard hats, goggles, gloves, and dust masks.
- Construction Materials: Wood, concrete, nails, insulation, roofing materials, and drywall.
Make a checklist to ensure you have everything before starting. You can buy tools, borrow from friends, or rent them from a hardware store.
4. Laying the Foundation
With your permits ready and tools gathered, it’s time to lay a foundation.
Types of Foundations
- Slab Foundation: A flat concrete slab that sits directly on the ground.
- Crawl Space Foundation: A few feet off the ground, providing space for plumbing and wiring.
- Basement Foundation: A full basement provides extra living space and storage but can be more costly.
Steps to Pour a Foundation
- Excavate the Ground: Remove the top layer of soil where the foundation will sit.
- Create a Form: Use wooden boards to create a mold for the concrete.
- Add Gravel: A few inches of gravel helps with drainage.
- Pour Concrete: Mix and pour concrete into the form, then smooth it out.
- Cure: Let it dry completely for several days.
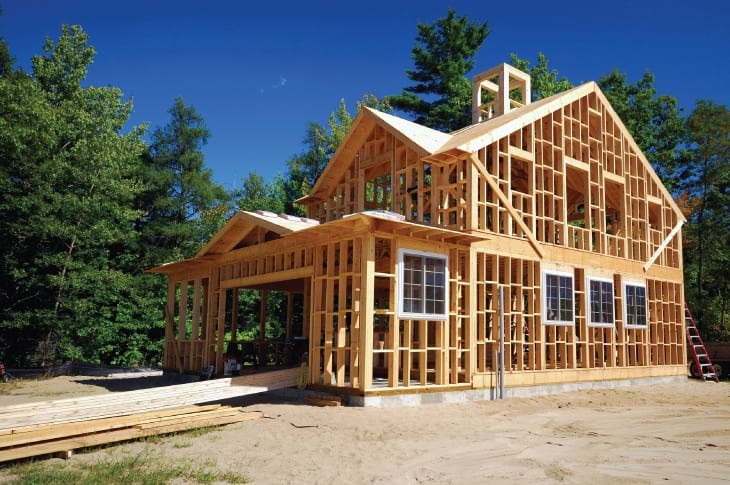
5. Constructing the Frame
Once the foundation is set, you can start framing your house. This step creates the structure of your home.
Steps to Frame Your House
- Lay Out the Floor Plan: Use chalk lines to mark where walls will go.
- Build the Walls: Construct wall frames using 2×4 boards. Attach studs vertically with top and bottom plates.
- Raise the Walls: Carefully lift the walls into place and secure them with nails.
- Add Supporting Beams: Include beams and headers for door and window openings.
Remember to regularly check for level and plumb as you build to ensure everything is straight.
6. Adding the Roof
With the frame in place, it’s time to put on the roof.
Types of Roofs
- Gabled Roof: A classic triangular shape.
- Flat Roof: Less complex but requires proper drainage.
- Hip Roof: Slopes on all sides, offering good stability.
Steps to Add the Roof
- Install Roof Trusses: These are pre-fabricated structures that provide support.
- Add Sheathing: Lay plywood sheets over the trusses to create the roof deck.
- Install Underlayment: A waterproof barrier prevents leaks.
- Add Roofing Material: Use shingles, metal sheets, or tiles to complete the roof.
Make sure to work safely and consider using scaffolding to reach high areas.
7. Installing Windows and Doors
Next, it’s time to let the light in! Installing windows and doors will help protect the interior and provide ventilation.
Steps to Install Windows and Doors
- Measure the Openings: Double-check the sizes of your windows and doors.
- Fit the Frames: Place the window or door frames into the opening.
- Secure with Shims: Use shims to ensure the frames are level and plumb.
- Seal and Insulate: Use caulk or insulation around the edges to prevent drafts.
Make sure to choose energy-efficient windows and doors to save on heating and cooling costs.
8. Finishing the Interior
Now that the exterior is done, it’s time to make the inside feel like home.
Steps to Finish the Interior
- Insulation: Add insulation in the walls and ceilings to keep your house comfortable.
- Electrical and Plumbing: Hire professionals to install wiring and plumbing systems safely.
- Drywall Installation: Hang drywall on the walls and ceilings. Tape the seams and apply a joint compound.
- Paint and Decorate: Choose colors and designs that reflect your style.
- Flooring: Install your choice of flooring, whether it’s hardwood, carpet, or tile.
Don’t forget to install light fixtures and outlets in the right places!
9. Final Touches and Inspections
Congratulations! You are almost there. The last step is to put on those finishing touches.
Finalizing Your House
- Landscaping: Plant grass, flowers, or trees to improve your yard.
- Driveway and Walkways: Create paths using concrete or stone.
- Furnish: Bring in furniture to make the space livable.
- Inspect: Schedule a final inspection to ensure everything is up to code.
Take a moment to appreciate your hard work and plan a housewarming party!
10. Conclusion
Building your own house is not only a way to create a place to call home but also a journey of learning and accomplishment. From planning to the final touches, each step can be both challenging and fulfilling.
Remember to take your time, ask for help when needed, and enjoy the process. Before you know it, you’ll be enjoying the cozy comfort of your very own home. Happy building!
That’s it! You’ve successfully built your own house. If you have any questions or ideas to share, feel free to leave a comment below. Happy DIYing!